

Chaos Cloth:Kinematic Collider using a Metahuman- UE5.5
Summary
This documentation walks through the process of setting up Chaos Cloth Assets, working with USD files from Marvelous Designer or FBX from any DCCs, and implementing kinematic colliders. Key requirements include using Unreal Engine 5.4 or above and having the Chaos Cloth Assets plugins enabled.
I will show you how to properly set up the mesh collisions, transfer weights, and configure the simulation self-collision settings. There is a dramatic improvement in cloth physics when using this method, with the garment properly colliding with the character mesh instead of clipping through it.
This is a basic implementation, more complex setups with selection sets and specialized options will be covered in future documentations.
A couple notes before starting:
First, ensure you are using Unreal Engine 5.4 or above and have the Chaos Cloth Assets plugin enabled.
Create a Chaos Cloth Asset by right-clicking in the Content Browser.
Have your usd asset exported out of Marvelous Designer ready.
Note: your cloth/outfit asset must fit the body of the metahuman to use perfectly, if not, the simulation will have issues.
Initial Setup and USD Import
The process begins with creating a Chaos Cloth Asset and importing USD files from Marvelous Designer. We will use a workflow of deleting the render mesh and using the USD import process, noting that this method prevents mesh doubling issues.
In chaos cloth graph:
“USDImport” Node: Import your USD file from Marvelous Designer.
if you don’t want to work with a MD asset, you can add a “StaticMeshImport” node and replace it instead of the “USDimport” node
Delete the render mesh from the USD import
Add a "Delete Element" node to remove the render mesh
Use a "Merge Cloth Collection" node to merge cloth collection.
Import the static mesh associated with your USD, using "Static Mesh Import"
Ensure only the render mesh is selected in the static mesh import


Use "Transfer Skin Weights" node to apply weights from your character mesh to the cloth - choose SK_body (in our case study we are using metahuman tall and fat body)
Weight Map Configuration and Physics Asset Setup
The documentation covers the process of adding weight maps to the cloth asset and setting up the physics asset using a MetaHuman mesh. I will demonstrate how to paint weight maps and explain the limitations of standard physics asset collisions.
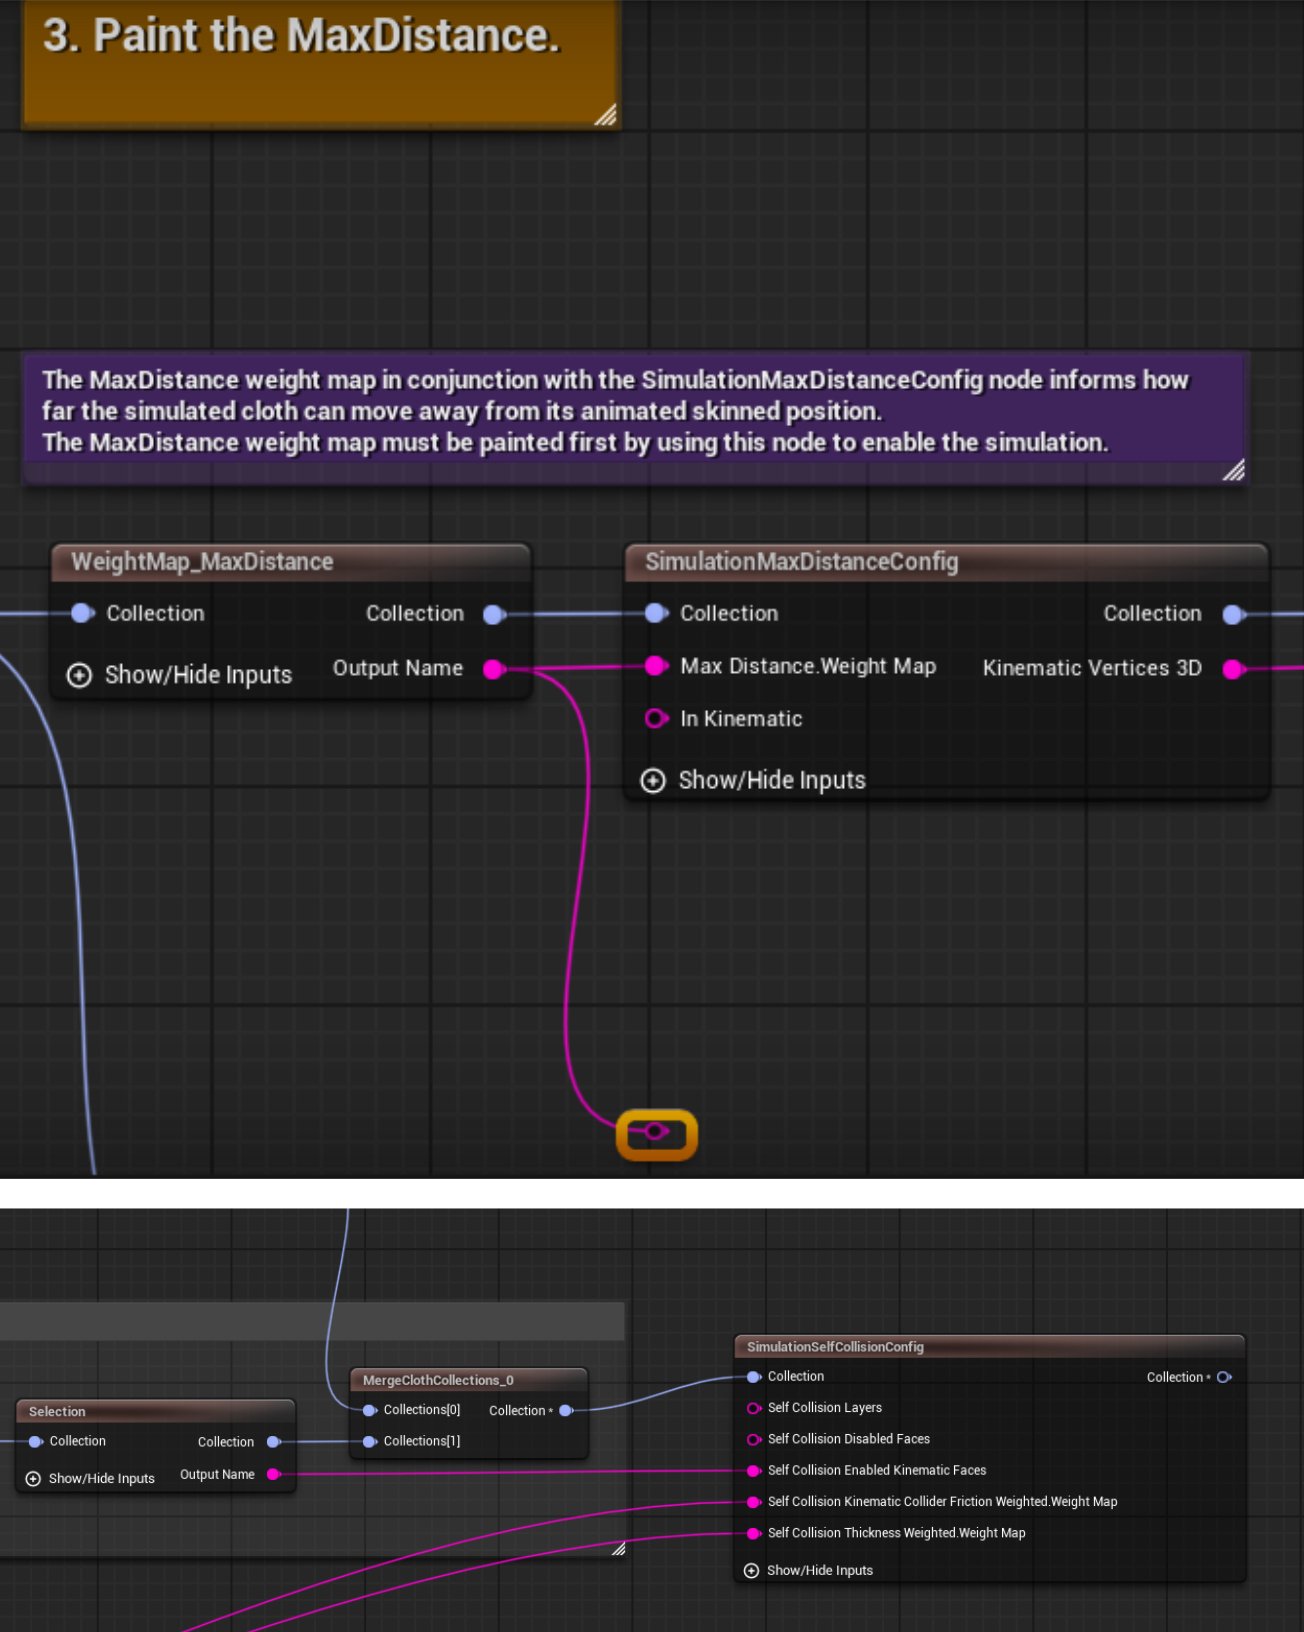
“WeightMap_MaxDistance” node, Paint weight maps in the 2D Sim view to control cloth simulation.

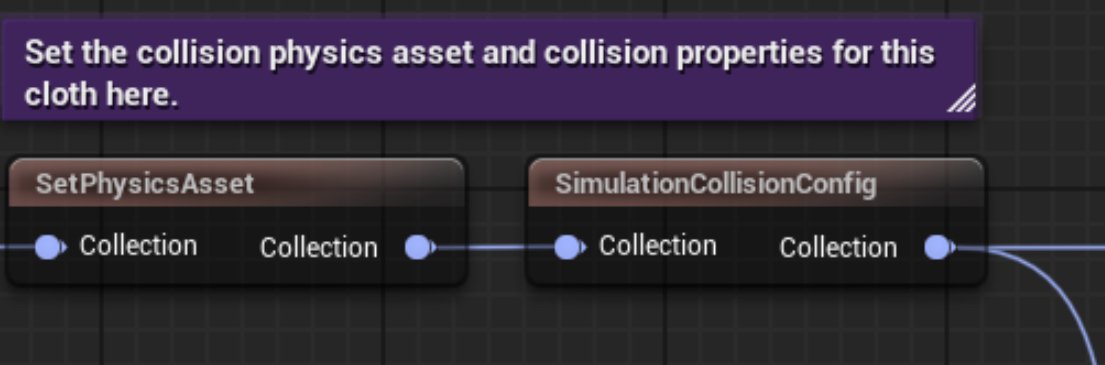
“SetPhysicsAsset” node: Add the physics asset of your character to the Chaos Cloth Asset, but first make sure you have a physical asset, if not you can create one in the content drawer -> right click on the SK_body asset -> create physics asset and done. Note: make sure to adjust the collider volumes to the asset body so they fit correctly.
Until here is the basic process of chaos clothing [with the exception of the delete selection nodes we add at the beginning] , now we will add a couple nodes so the simulation can use a kinematic collider.
Implementing Kinematic Collider
The key section focuses on setting up the kinematic collider using a static mesh. We will walk through the process of selecting collision areas and configuring the simulation self-collision settings, demonstrating how this prevents cloth clipping through the character.
Create a static mesh of your character to use as a kinematic collider.
Option 1 : Transform the metahuman SK_body asset into a Static Mesh by clicking “Make Static Mesh” option when you open the SK asset. This option will be located in the upper bar menu, almost by the center. This will give us the by default headless body as collider.
Option 2: Get your metahuman body and face mesh to maya/blender and merge both, then bring it back to unreal as a low poly static mesh collider that has a head and a body
This is the method that I recommend and that in my experience works better. Specially if you have clothes that will interact with the neck and shoulders.

Import the static mesh for the collider using "Static Mesh Import" node selecting only the Sim mesh
Transfer skin weights to the collider mesh with the node”TransferSkinWeights” and select the Sk_body
Use a "selection node" to select the parts of the character mesh that will collide with the garment and In the viewport, select the areas of the character that will interact with the cloth.

Add another "Merge Cloth Collections" node
Name the output name to a custom name
You should have this by now:

Add a "Simulation Self Collision Config" node
Connect our Output name mesh with Set Collision kinematic faces - we are telling the system which mesh to use as a kinematic collider

Plug in the weight map distance for thickness and friction
Plug in the new add graph to Connect the "SimulationSolveConfigLod0" output to the new merge collection[0]

Now add the chaos cloth asset to the character bp
Go to the character blueprint and add a chaos asset, now just choose the asset we just created and good to go!
Still not simulating right?
Try this:
-check the physics body asset : ensure that colliders fit properly

Improve the cloth simulation weight painting (sometimes less is more!)

play with the values: import parameters from marvelous like stetchines, friction and thickness simulation
blue icon means that it is using the marvelous designer cloth simu parameters (we want this!)
